Showing posts with label For Teachers. Show all posts

Saturday, June 01, 2013

Making flower from strips of paper


This was gifted to my daughter's teacher.
The flowers were gifted to my Son's teachers.


While I was volunteering in class, one of my work was to trim the artwork done by kids (from my Son's class) and stick them onto another cardstock. So instead of throwing all the trimmed strips of paper  I decided to make something out of them. These were watercolor painting and were of different  colors. So all I could think of is making flowers out of them.  Turned out very beautiful and I gifted them to the teachers during Teachers appreciation week.


The strips I had were of different colors and different size in length and width. All I did was for one flower you need 4 strips (which will give you 8 petals) which I made sure they are the same size in length and width so that the flower petals will be uniform. Then you take one strip keep the white side facing you and then fold from both ends towards the center. Then take the next strip and continue to fold the same way. Then place this folded strip in the plus way and staple it. Then take the next 2 strips fold them the same way and staple it in the x direction. Then place the x folded flower on top of the plus folded flower to get the result. I made the kids also do some flowers. I had ready made paper flowers which I bought from Micheal's, taped it to flower in the center to hide all the staples. The kids chose those flowers and stuck them with glue.

Once you are done with all the flowers, I stuck each flower to a stick (with a tape) so that the teachers can use the flowers in future. Then arranged as shown in pictures and gifted to them.

the pot painting and other things you see were done by my kids and you can refer to the blog "Teacher appreciation Week - 2013".

Teacher Appreciation Week 2013 by Kids.

Gifts made by my Son .
Gifts made by my daughter

 This is this time of the year I make my kids do little things for their teachers to mark our appreciation for all the hard work they put in.
We used materials which I had at home.


TerraCotta Pot :-

My kids are now grown up and are all ready to do a painting of the pot all by themselves. My Son painted the pots dark blue and yellow on the rim. My Daughter painted bright pink and purple on the rim. Always have used acrylic paints for such projects. Then I used something called bead paint (which can be used on fabric) , had it with me, and made them do dots  (written Thank you on top). They had to put dots on the written word. Then on the pot base where its blue and pink, I had bought this bead stickers from Micheal's craft store. One side of the pot they stuck a apple sticker, the other side they chose a flower sticker. This was a ready made sticker which I bought. So all they had to do was to peel it from the paper and stick on the pot.  This was easy for my 6 year old to do.

Badge design:- 
I bought this badge (3 of them as a pack) from the craft store. They designed it for their teachers. My son had 2 teachers and my daughter had 1. Instead of just drawing on paper, they can wear it as a badge and this was also easy for them to do. They cut out a round white paper and drew and colored it. Then they needed help in putting the white paper inside the badges.

Embroidery book mark :-
This was a tough and new project to try out by kids. It was not for my daughter but she still decided to give it a try. My Boy was curious about punching holes on the design. It was very simple flower design , and each petal is just a heart. So he had to punch holes on all heart (using the template I had) and then using embroidery thread I taught him one petal how to go about doing the design and he completed the rest.  He got the pattern immediately. I had to help out my 6 year old, with this more as she is still small for such crafts.
I had this snowflakes which they glued on the pot and on the book mark.

These were all done by the kids. There is one thing which I contributed, "Paper flowers using strips of paper" which you can view for detailed instructions on that project.

Refer to my other projects of terracotta painting or embroidery on Paper for detailed descriptions.
1. First terracotta pot painting.
2. Embroidery book mark
3. A bookmark- paper embroidery and Quilling.
4. Terracotta candle holder.


Friday, May 18, 2012

Teacher Appreciation Week 2012 - by my Son

Teacher Appreciation Week for my Son's Teacher.

Its again this time of the year where we appreciate our kids teachers for all their effort. My Son loves to come up with ideas and since he is 8 years, I cannot influence him too much with my ideas also. He was very clear that he did not want to do the same as his sisters ideas, hence a different post as the gifts/ideas have individually come from them and are different.

Day 1 - Acrostic Bookmark- He has come up with an acrostic poem bookmark for his teacher.


Bookmark (Front side)
Bookmark (Back side)


 During my Son's birthday we had donated a book to the class. So he wanted to make a bookmark which his teacher will use for that book and later for herself, as she is reading this book to the class. He loves rainbow colors and he loves acrostic poems. Last year he has done acrostic for  "Teacher," he modified it to describe his current teacher and did a acrostic for Rainbow. So basically its a  "Rainbow bookmark for a RAINBOW (Acrostic) TEACHER (Acrostic)". My only help was for printing out for him and putting contact paper to the book mark so that it will not get dirty easily.


Paper fortune cookies
Day 2 - Fortune appreciation  - This idea came up when I asked my Son to come up with 10 things he likes about his teacher which in turn will turn into memories of 2nd grade. He easily came up with the 10 things, but we wanted the teacher to enjoy it in a unique way. Tuesday is the day where 2nd grade parents are providing lunch for all the teachers, so the idea clicked of presenting it in fortune cookie way. My son loves fortune cookies when we go to Chinese restaurants, so we decided to make it "paper fortune cookie" where his teacher can open it and read them. I have bought a take out box and filled it with these cookies and put a small note for his teacher. Initially idea was to make my son do the paper cookie but it was hard so I had to do them all. Got the steps from youtube.


Sail boat thank you
Day 3 - Sail boat Thank You -  During my Son's spring break, he painted a terracotta pot holder plate. He painted the plate blue inside with red rim, and Yellow outside with green rim. The colors were chosen by him and painted by him. Only the glazing /shine paint was done by me. The idea was to use this plate to hold the fortune cookies, but once this was done, he loved the piece and wanted to use it to do the sailboat for his teacher. So he finally learn to make a sailboat with a paper and pasted it to the plate. Since the plate looked too plain, I bought some fish stickers, he stuck them near the boat. On the sail boat he colored them with a sketch pen and on the base he wrote "Thank you for a smooth sailing of learning. It was Fun". Making of sailboat was much easier for him than the paper fortune cookie.


Day 4 -  Puzzle - I asked him to come with some puzzle for his teacher.  He had read about code word (i.e for each letter you assign a number) and instead of writing the letters you put dashes and a number for each dash (representing the letter). Since it was his idea I did not want to change anything. All I did was to stick it to a colored card stock and rolled it and tied a orange ribbon to make it look presentable.


 Day 5 - Gift Card Holder - My son wanted to give a gift  (gift card) which will be useful for the teacher. So I decided to come up with something nice for his Teacher. So I designed a Gift Card holder. Since Teachers keep getting gift cards, I decided to create one (which can hold about 12 gift cards). They can keep it in the car instead of carrying all the gift cards in their hand bags.  Hoping his teacher will find it useful.

My Son is going to come with the order (he wants to give) his teacher. I've just put them all up here in my own order.

My Son came up with some ideas and so did I with some, but I had intense joy in helping my Son do this for his teachers, as this is our only way to show our appreciation and gratitude for all their efforts and time they put in each and every day.


Sunday, May 13, 2012

Teacher Appreciation Week 2012 - by my daughter

Teacher Appreciation Week for my Daughter's Teachers.


Its again this time of the year where we appreciate our kids teachers for all their effort. This time I wanted to bring it out from the kids with very little help of mine. Since my daughter has started going to school, and is able to follow instructions, this time it was much easier than last year to make her do for her teachers.

We made gifts for the 5 days but gave it all on one day. She wanted to do it all on one day. We chose middle of the week and decided to give it to her teachers.


Day 1 Bookmark  - My daughter reads very well, and so wanted to thank them with a bookmark.

bookmark (front side)
bookmark (back side)
This is a very simple bookmark. If you see my other projects, this bookmark (in red) is a blank bookmark bought from the craft store (Micheal's craft store). On the Front side I had stuck a blue card stock. The flowers you see were bought  from this craft store. It had pins attached where you can prick a hole and fix it to the card with that pin. So I wanted to keep it very simple. The backside of the bookmark, I asked my daughter to write a note for their teacher "I love to read, thanks to you that I read so well!". She drew a small little girl and wrote her name below that. So this way we both put in effort.

Thank you note
Day 2 Thank you Note - My daughter made this on computer with the software kid pix. She loves to work on kid pix software, so I asked her to make a card for her teachers.  She  chose a rose and she added the border design and wrote a thank you and  her name. So I only helped her by printing this out and sticking to another thick card stock.


Paper Clay Magnets
Day 3 Magnets - During her spring break, she was doing things with paper clay so we decided to do some for her teachers. So all the 3  (we had clay molds) which she used to get the shape. She painted them last week before giving them. My part was to help her paint  the glaze paint (the glaze/finish) on them. Then the star face was drawn by me as she had already gone to bed. Following day after they were dry I had to stick magnets at the back, so they can be used as magnets. So that was my part but making the clay magnet was my daughter's part.

Day 4 Thank You Card - She wanted another card (with stickers).
I asked her to draw something for her teachers, and you won't believe it, she came with this heart sign (With I love you written inside) and the thank you coming as the string, she made it like a balloon, which I was really taken back. This was done on a white paper, so we used it as the inside of the card (stuck it to the inside). The front side had flower stickers so we used one flower and wrote Teacher appreciation week , and she stuck some bead stickers on top and bottom. Very simple but she loved doing it for them.

Day 5 - Gift for the teacher - She wanted to give something which they will use. Packed it in a little pouch and put all the item/gifts in one gift bag.

My daughter came up with some ideas and so did I with some, but I had intense joy in helping my daughter do this for her teachers, as this is our only way to show our appreciation and gratitude for all their efforts and time they put in each and every day.


Friday, December 23, 2011

A Gift/card holder designed for teachers


Its his time of the year where I usually make unique gifts for my kids teachers (one for my son's teacher and 3 for my daughter's teachers). Since our family was going through a season of flu and all taking turns in falling sick, I could not paint or craft anything for them. Due to lack of time, decided to gift them a gift card so they can use it anytime in buying what they want. Did not want to keep it very simple , so I used my creativity in packing the gift card.

Gift card holder Jar: Asked the kids to choose a jar from the craft store. My Son chose penguin jar and my daughter chose the snowman jar. I bought gift card holder which can fit inside the jar and placed the gift card. I thought surrounding the gift card I wanted to fill something. So I thought of a wonderful idea of filling the jar with nice Christmas quotes and New year quotes which they can read during the holidays.

Instead of printing them on plain white paper, I bought Christmas card stock paper. They had different designs. Printed about 9 nice quotes or sayings on 2 different prints of paper. Cut them into 9 strips, and used a crimping tool to create a texture to the paper. Then the kids rolled them and placed them inside the jar. I made the kids roll them so they can be a part of it too !

Quotes/Sayings which I used are...
-------------------------------------------------------------------------------------
There is no surprise more magical than the surprise of being loved.
It is God's finger on man's shoulder.
~Charles Morgan.
-------------------------------------------------------------------------------------
From home to home, and heart to heart, from one place to another
The warmth and joy of Christmas, brings us closer to each other.
~Emily Matthews
-------------------------------------------------------------------------------------
The best of all gifts around any Christmas tree:
the presence of a happy family all wrapped up in each other.
~Burton Hillis
-------------------------------------------------------------------------------------
May the spirit of Christmas bring you peace,
The gladness of Christmas give you hope,
The warmth of Christmas grant you love.
~Author Unknown
-------------------------------------------------------------------------------------
Ring out the old, ring in the new,
Ring, happy bells, across the snow:
The year is going, let him go;
Ring out the false, ring in the true.
~Alfred, Lord Tennyson.
-------------------------------------------------------------------------------------
Year's end is neither an end nor a beginning but a going on,
with all the wisdom that experience can instill in us.
~Hal Borland
-------------------------------------------------------------------------------------
For last year's words belong to last year's language
And next year's words await another voice.
And to make an end is to make a beginning.
~Author Unknown
-------------------------------------------------------------------------------------
The color of springtime is in the flowers,
but the color of winter is in the imagination.
~Terri Guillemets
-------------------------------------------------------------------------------------
Winter is the time for comfort,
for good food and warmth,
for the touch of a friendly hand and
for a talk beside the fire:
it is the time for home.
~Edith Sitwell
-------------------------------------------------------------------------------------

Very simple craft but it was indeed very much appreciated by all the teachers ! They just loved reading all the quotes they said.

Monday, May 09, 2011

Teacher Appreciation Week 2011

Its again this time of the year where we appreciate our kids teachers for all their effort. This time I wanted to bring it out from the kids with very little help of mine. Since my daughter has started going to school, both my kids have done for their teachers.

My Daughter's Work :
We did 5 things giving her 1 per day. I kept it very simple ,and wanted her to color and draw.
1) drawing1 and drawing2 - very simple, wrote Thank you , she colored it, and I did the border with different colors. Idea is from my daughter, she in a blank paper keeps coloring different colors (think lines), so thought of using her idea and coloring different colors around for border. Her idea but I did the coloring as it was a lot for her to do.

2) drawing 3 - When I asked her to draw something for teacher, she drew 4 balloons. So instead of 4 I asked her to draw 7 for each letter in (T E A C H E R). Then came up with some describing words for each letter. [T-alented, E-nergetic, A-ctive, C-aring, H-elpful, E-xtraordinary and R-esponsible.]

3) drawing 4 - Asked her to draw an apple and color it (helped her with drawing of apple) but coloring is her work. I wrote the happy teachers appreciation week in pencil and she wrote on top of it with a black pen.

4) The last gift was a 8X10 photo of her class doing a silly pose. It was very cute and I thought they bought out the best in them, this can be a good memory for them to keep.
Just to add "She enjoyed doing all of it", and that's what makes me HAPPY !


My Son's Work :
It was from May 9th - May 13th and we again did 5 things 1 for each day. He wanted to very similar to his sisters but a little different.
1) Drawing1 - very simple, wrote Thank you , He drew and colored it, and He did the border with different colors. Idea is from my daughter,but he liked it and wanted to do it exactly similar.

2) Writing1 - We got this poem from the web and thought it was very appropriate for his teacher. I wanted to give each letter (describing her) each day to make her special, but my Son had forgotten to give her the first 3 days. So we just gave this sheet on the third day.

3) Drawing 2 - When I asked my Son to draw something for his teacher, he drew kids , and he drew 20 of them to represent all the kids in his class and he wrote " You are the best". This was totally his idea.

4) Drawing 3 - He also drew a Robot and wanted to give it to his teacher, so I asked him to write "From Pranay" And thank you on it. He loves Robots and wants to be a Robot, so why not represent this drawing to be him ? It was his idea of drawing this Robot but my idea of "representing my son as Robot".

5) The last gift was a 8X10 photo of his class all of them dressed up as 101 dalmatians. It was very cute and I thought She bought out the best in them, this can be a good memory for her to keep.

It makes me happy when I make the kids do it for their teachers. This is very little effort we put for all the efforts the teachers put throughout the year.

For my other appreciation crafts done by kids refer to the post "Teachers Appreciation 2010"

Monday, February 14, 2011

Woven Heart Basket for Valentines Day !


This was indeed a very nice craft to do. I made this for my Son's and Daughter's teachers. I wanted to make this for putting a gift card and few chocolates for the teachers.  I got this idea from the following website :
http://familyfun.go.com/how-to-videos/familyfun-woven-heart-basket-762419-v/

I would really like to thank them for this wonderful Idea. This is very simple but very elegant to hand out gift cards to the teachers.


Steps to go about doing this craft can be taken from the above mentioned website or for convinience I've pasted them below too !.
Materials for this project are :
  • Printable patterns (see Step 1)
  • White or colored paper
  • Markers or crayons (if using white paper)
  • Scissors
  • Glue
Instructions
  1. Print two copies of this template. If you are printing the templates on colored paper, print one of them on pink paper and the other on red; otherwise, print both templates on white paper and color them as you wish with markers or crayons. 
  2. Fold the printouts in half. Carefully cut out the shapes and cut along the dotted lines. The weaving steps will be a bit easier if, as a crafter has pointed out in her comments below, you cut a bit further up the inner dotted lines than indicated. Go slowly -- the more precise your cuts at this step, the better the basket will look.
  3. Time to start weaving. Orient the two halves, still folded, at right angles to each other, as shown in the photograph. Be sure that the "bumps" on the strips on each half point away from you.
  4. Now thread the left-hand strip furthest away from you through the right-hand strip furthest away from you.
  5. Thread the right-hand strip furthest from you through the next left-hand strip, the one second-furthest away from you.
  6. Now thread the next left-hand strip, the one third-furthest away from you, through the right-hand strip furthest away from you.
  7. Thread the right-hand strip furthest away from you through the left-hand strip second-furthest away from you.
  8. Finally, thread the left-hand strip closest to you through the right-hand strip furthest away from you. Whew! One pass down, four to go.
  9. Snug the right-hand strip up towards the curved end of the left template as far as it will go and smooth everything down (a process you should repeat after each round of weaving).
  10. Thread the right-hand strip second-furthest away from you through the left-hand strip furthest from you. See the pattern? Continue alternating your weaves either through or around the other strips until all the strips are finished.
  11. Glue on a paper handle if you like.
follow steps1 & 2.
follow steps  3 & 4.
Follow steps 5-10.


Final View

Friday, February 11, 2011

Terra Cot Pot Painted - Birthday Gift for my Son's Teacher

The was a Terracotta Pot Painted by me for my Son's 1st grade Teacher for her birthday. We had purchased a gift for her to place inside this pot and wrapped it up. My Son also made a greeting card for his Teacher.
The Terracotta pot was painted Dark Purple. 

Then painted small squares (each square is painted different color) to have a letter of her name.  Outlined the squares with white paint. Then painted some flowers on the top of the squares and bottom of the squares and some celebration lines with different colors to finish off in the middle and on the empty space. The rim of the pot was painted with Golden metallic paint. Wrote her "name" and said "class" in white paint. Lastly gave the pot its shine by painting a glaze paint. The inside of the pot was also painted dark purple and a glaze paint to give the pot its shine.

Hoping his teacher will like this pot and will be used well inside Class.

Refer to some of my Terracotta projects for detailed descriptions. 


Monday, November 29, 2010

Gift for teacher June 2010 - Painted terra cotta pot


As the school year ends, we decide to give teachers gifts. When it comes to individual gifts, I try to do something along with the gifts I buy. This time for my daughter's school teachers (year school ends in June) I decided to paint the terracotta pots and give the gifts and pack it along with these. The Pot can be used to plant pots or to use inside class as (pencil/pen) holders.

I painted 5 pots, 2 big yellow ones are for the 2 main teachers and the 3 small ones are for the remaining teachers who have helped. The size was no intentional, I got the count wrong and had to get 3 smaller ones as  the big size was not available.

The 2 pots were painted yellow with purple on the top, did some designs on the. The other 3 were painted pink with gold color at the top rim. Did a design with a black pen.To finish it I glazed the plate with glitter glaze to give the finishing touch (its shine).

To fill inside these pots, you can buy small gifts and wrap them and personalize it the way you want them. I bought small gifts put inside them, wrapped them with a transparent sheet and tied a ribbon on the top.


For more information on Terra Cotta painting refer to my blog "First Terra Cotta pot painting" . Another craft was the terra cotta candle holder "Terra cotta candle holder".

Monday, August 09, 2010

Unique gift card holder which can fold and expand


This Gift Card holder is Unique in its design , it can be folded and can be expanded. When expanded it shows the gift card and all the kids names. This was created for my Son's tamil (language) teacher for the year 2009-2010.


In a long strip of paper first make sure your gift card fits. In the remaining space fold the paper to that many number of kids in the class. Since this class had only 9 students, it was easy to use this method. So in each fold write one kid name in different colors.

On the left hand side wrote the teachers name. On top I wrote "From all of us" and at the bottom after the kids names in the middle, I added "and Parents".

On the 2 ends, I punched a hole and added the 2 ribbons to tie the 2 ends after folding the card. So this card can be folded. Placed it inside a pouch so that its easy for the teacher to carry.

Everybody really liked the idea because all the kids names could fit inside one card.


Friday, February 12, 2010

Valentine flower Arrangement

My Daughter's day care teachers were celebrating the valentines day with all the kids exchanging gifts, to make the day special for her teachers I decided to do this flowers arrangement and box of chocolates as a last minute gifts. I really hope they will appreciate and like it.

To go ahead with this project all I did was I purchased all the items individually and put them together. The Tin and the Red Red artificial flowers were bought from the a craft store (Micheal's craft store). The tin was already painted red with white hearts and had a pink ribbon attached. I bought a Styrofoam , to fit inside the tin, arranged the flowers on the Styrofoam and placed them inside the tin. This whole project was done less than 45 minutes. Also one of the reason I have not glued the Styrofoam to the tin is basically to give the flexibility to them to use the tin for other storing purposes (holding kids pencils or crayons or even for potpourri arrangements).

The red color heart chocolate box was placed inside the flower arrangements before giving it to the teachers.

To see one more of my flower arrangement project you can refer to the recently done craft for my son's school teacher "Teacher's appreciation week gifts".

3 Flowers from pipe cleaners


When we suddenly came to know about My son's teacher's birthday and my son wanted to do something for her, we decided to try these a bouquet of flowers with the pipe cleaners.

First take the red pipe cleaner and make it into round coil form. Then take the blue pipe cleaner and start making a flower shape (like an oval) going underneath the red coiled pipe cleaner and coming above and so forth. I used two blue pipe cleaner to make one flower( 5 petals). Then attach it to the green stem (green pipe cleaner). Similarly do the orange flower and white flower and attach them to the green stem. It was a cool thing to try out with a 5 1/2 year old boy.

Then added a white (address label sticker) and asked him to write happy birthday and another one from having his name and attached it to the bouquet.

Thursday, February 04, 2010

Teachers appreciation gifts - year 2010

A Terracotta Painted pot and A Book mark by Me.
A drawing and a thank you note puzzle by my Son for his teacher.

Teachers appreciation week in my Son's school is celebrated from Feb 1st to Feb 5th 2010. The Theme is winter olympics and tagline was "our gold Medal educators". Every day we need to take specified items (assigned by PTO) to the teachers. Details given below for each craft/project work completed by Son and me.

Day 1 - Fresh cut RED, White or Blue flower to support our USA olympic team.
My project :- When we think of olympics we first think of the opening ceremony to light the olympic torch. Hence I used a similar idea of to start the appreciation week with a "TORCH". The pot was painted, decorated with "RED" and white flowers and on the middle placed the white candle to represent it like a TORCH.
My pot colors were Red at the bottom, white in the middle and blue on the top of the pot. At the rim I painted it dark yellow to represent "GOLD". I added few dots, stars and spiral design to fill the pot with gold and black pen. On the white part I added this quote "A good teacher is like a candle - it consumes itself to light the way for others", Added a "Thank you" in the front on the red colored area. Finally glazed the pot to give its shine.

Day 2 - Classroom Supply. Whatever is the supply we need to pack the supply in either red/blue or white wrapping paper.
My Son's Project :- Made my son draw something for the teacher to show his way of appreciating the teacher. Taught him the Olympic symbol, the significance of the torch and few sports. So he decided to draw a man skiing and snowboarding for representing "sports" and snowman, a Christmas tree to represent "winter". He also drew the Olympic symbol along with 2 medals and wrote the letter "T E A C H E R" and wrote a Thank you at the bottom of the page.


Day 3 - Gold medal/Ribbon note : written note from the student to the teacher thanking or praising them for an accomplishment or nice gesture.
My son's Project :- One day as he was working on puzzles, he took one puzzle with 12 pieces and drew/traced it on paper and gave a color to each puzzle pieces. We thought this was his creation and will use this to write a thank you note for his teacher. I asked him to write on small white stickers "the thank you note wordings" for each puzzle and made him paste it on each of the puzzle pieces. Over all its the thank you message broken down into 12 pieces. Due to the time limitations for the teacher, we are not going to cut the puzzle but just give that sheet as a thank you note inside a envelope.


Day 4 - A New, grade level appropriate, book or game for the classroom.
Bookmark project :- Since we were donating a book to classroom I wanted to have the teacher have something for memory. Crafted this bookmark for her memory.
Take a red book mark card card stock. I used a concept of "Paper embroidery (oval design and flowers outside as borders) and quilling to make the flower (inside the oval design) on the book mark. Then to fill the gap I added a small ribbon on the top and added 2 flowers (bought from a craft store) at the top and the bottom. Its in a form of sticker. Stick another red card stock at the back of the bookmark to make it look clean and to write a note for the teacher.
For detailed information of this project refer to "Bookmark - Quilling and paper embroidery"

Day 5 - Come dress in Red, white or blue to honor the teachers.
this was simple and nothing extra done but dress my boy and send him to class.

This whole project done this week gave me a sense of satisfaction and happiness when I can make something personally for the teacher to appreciate her work.

Tuesday, February 02, 2010

A Bookmark- paper embroidary and Quilling

Bookmark project :-Initiated this project make something useful for my son’s teacher as one of her appreciation gift. I have used 2 craft concepts in making this bookmark. One is paper embroidery and the other concept is Quilling.

Quilling, also known as paper filigree, Artist discovered that narrow strips of paper could be rolled, scrolled, fluted, and fringed to make beautiful designs. Quilling can be added to any scrapbook, memorable photos, certificates, invitations, announcements, and greeting cards.

Paper Embroidery is not new to me. I have done couple of projects and you can refer to them for more information.

Bookmark project :- Take a red book mark card card stock and did the oval embroidery design in blue color thread and the flowers in light pink color as a border (four on the top and four below).
The flower inside the blue oval part is another craft concept called "quilling". You roll thin paper using a tool and once done shape it to any shape and glue the end to the shape. So each petal of the flower was done separately and glued to the card.

Then proceeded with the round shape in green color and stuck it next to the flowers inside the blue oval part. Then to fill the space outside the oval area, I added a small ribbon on the top and added 2 flowers (bought from a craft store) at the top and the bottom. Its in a form of sticker. Stick another red card stock at the back of the bookmark to make it look clean and to write a note for the teacher.

This gives me a sense of satisfaction and happiness when I can make something personally for the teacher to appreciate her work.

For more information on my embroidery project on paper refer to my blog "Embroidery bookmark".

Thursday, December 17, 2009

Glass painted candle holder and basket decoration


Initiated this project with the interest of expanding my knowledge in glass painting. This was my long time craft which I could not try out as I have small kids as the glass paint is not safe to be used when they were at home.

Since my kids have started going to school, decided to try out and make something useful for my daughter's day care teachers, 2009 christmas gifts. Made 3 of of them. Also to the right you will see a basket. The work was also done by me. Details are given below.

Glass Candle holder :- Clean the surface with a nice soft cloth. Traced the design on a paper and kept it inside the glass holder such that the design faces out. With a gold out liner (delta brand air dry permEnamel Accent Liner for glass,ceramic and tile) outlined the design shown. Then waited 24 hours for this to dry. Then painted the red flowers and green leaves with glass paints. The glass paints I used was bought from India. We need to paint the red and green such that it does not come out of the lining. This was a very tough project as the glass candle holder is a curvy object and we need to hold it in place such that each petal or leaf I painted sets before I keep the holder down, otherwise the paint will run out.

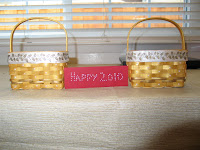
Basket decoration :- I wanted to package this candle holder,the red bookmark (shown above) , a greeting card and another gift inside this basket. This basket was bought from a craft store. It was very plain basket with the Christmas ribbon attached to it. I gave its shine by painting with gold metallic paint and then with white paint I put thick white dots to look simple and yet elegant. Packaged the whole thing like a basket gift. They just loved it.

Red Bookmark :- Due to the time limitations I could not do a detailed design for the bookmark. But just wrote happy 2010 in a dotted format. Came out pretty cool.

The teachers loved the gifts and especially when they came to know that I had done the whole thing and packaged it like a gift basket to them.

Thursday, May 28, 2009

Magnetic pen holder or a gift card holder


One of the teachers in my daughters day care were leaving (May 2009),I had to complete this project in a day as her last day changed all of a sudden. So due to time limit constraint, I executed this project for all the teachers in a day's time. So I basically came up with a multipurpose item as mentioned in the title.

Painted this wooden gift bag in Red color (used metallic paint) to get the shiny affect. Then stuck 3-d gem stickers on them to fill up the space. At the back of gift holder I pasted the magnet (comes with one side sticker and other side magnetic layer) to create a magnetic pen holder.

Filled it with a thank you card, a gift card and some chocolates.

So here is a simple project for anybody to do in a day. The ladies liked it, and its simple and different .

Wednesday, December 17, 2008

Embroidary Card - Holly Wreath

Initiated this project to make a card for my son's school teachers. Since I was busy with my baby last year, I could not do something of this kind ( Embroidery on paper) which needed effort and patience.


This card design downloaded from online, pre-pricked the embroidery design with a special piercing tool and pricking pad. Completed the embroidery (Green for the leaves, yellow for the bow each of them with - 2 strands of embroidery thread) and finished off with red dots for border, and wrote Happy 2009 in the center.


Covered the inside of the card (which shows the thread) with another white sheet so it looks clean and nice. Wrote a personal message on the inside of the card.


This gives me a sense of satisfaction and happiness when I can make something personally for each of them to appreciate their work.

For more information on my embroidery project on paper refer to my blog "Embroidery bookmark".

This was one of the craft I did for them.. Refer to the other gift I did for them in my blog "Terra Cotta Candle holder".

Saturday, December 13, 2008

First Terra Cotta POT Painting

Terra cots Pots :- have come a long way into the crafting world with delightful results. They can be used for candle holders, bells, ornaments, and even angels. You can use any type of stencils or rubber stamps, rub-ons , scrapbook papers, florals, charms, buttons and everything. The book I reffered for my projects are from Micheals store "102 Terra Cotta Projects" by Lenae Gerig.


About my project

This was the second gift given to the teachers during Dec 07 Christmas time. To view the other gift done for the teachers Refer to blog "Dec 07 ceramic gifts for teachers". Designed it as a candle holder and of Christmas theme. Painted the pot green and the rim red. Then did a snowflake design with white pen (terra cotta marker pens) and wrote merry Christmas on them. Painted the inside of the pot black. Sealed with a glaze selear which gives a shiny effect for the pot. In some pot as you can see I have used also the golden pen for the design. Wrote my son's name and the class name under the pot.

The basic tips for working with Terra Cotta pots are

  • Sealing :Terra cotta is very porous and requires sealing before painting. Seal with the liquid sealer before painting. This will save time, the amount of paint used to cover the pot and help prevent breaking and chipping.
  • Painting your Design : Paint your project with the desired colors and design.
  • Seal at the end: After painting your pot, seal again, this will not smear any pen work and give a nice finish. I used a glaze sealer, which gave a shinning effect to it.


Dec 07 Christmas Gifts for teachers


Have been doing lot of ceramic projects, but did not find the time to upload them in my blog. I guess with 2 kids just life circles around them and we hardly get time to update.

Coming to the picture on the left was given to my son's school teachers (preschool class ) (did 2 of them same type). This was tough one as you had to mark each row and paint different colors (3 times to get that intensity). Then the black design was done with a stamp with the black paint done only once. Under the mug wrote the teachers names in black paint and the class name.

The picture (purple and yellow) on to your right was given to his music teacher. This also you had to mark the columns and paint them alternatively purple and yellow 3 times. Once they are dried, made the white design (love sign) and wrote "live, Love and laugh" on each column.


For more info on my ceramic painting experience refer to this link on "Introduction to ceramic painting" post.
To view the other gift done for the teachers Refer to the blog "first Terra Cotta pot painting"