Showing posts with label Stitching or Embroidery crafts. Show all posts

Saturday, June 01, 2013

Teacher Appreciation Week 2013 by Kids.

Gifts made by my Son .
Gifts made by my daughter

 This is this time of the year I make my kids do little things for their teachers to mark our appreciation for all the hard work they put in.
We used materials which I had at home.


TerraCotta Pot :-

My kids are now grown up and are all ready to do a painting of the pot all by themselves. My Son painted the pots dark blue and yellow on the rim. My Daughter painted bright pink and purple on the rim. Always have used acrylic paints for such projects. Then I used something called bead paint (which can be used on fabric) , had it with me, and made them do dots  (written Thank you on top). They had to put dots on the written word. Then on the pot base where its blue and pink, I had bought this bead stickers from Micheal's craft store. One side of the pot they stuck a apple sticker, the other side they chose a flower sticker. This was a ready made sticker which I bought. So all they had to do was to peel it from the paper and stick on the pot.  This was easy for my 6 year old to do.

Badge design:- 
I bought this badge (3 of them as a pack) from the craft store. They designed it for their teachers. My son had 2 teachers and my daughter had 1. Instead of just drawing on paper, they can wear it as a badge and this was also easy for them to do. They cut out a round white paper and drew and colored it. Then they needed help in putting the white paper inside the badges.

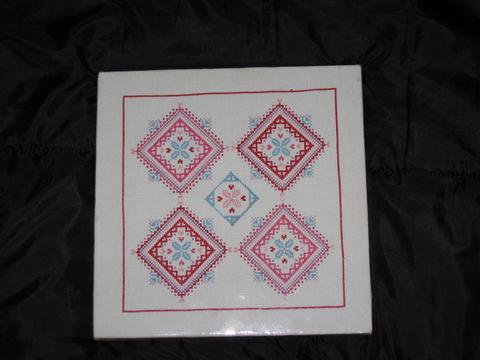
Embroidery book mark :-
This was a tough and new project to try out by kids. It was not for my daughter but she still decided to give it a try. My Boy was curious about punching holes on the design. It was very simple flower design , and each petal is just a heart. So he had to punch holes on all heart (using the template I had) and then using embroidery thread I taught him one petal how to go about doing the design and he completed the rest.  He got the pattern immediately. I had to help out my 6 year old, with this more as she is still small for such crafts.
I had this snowflakes which they glued on the pot and on the book mark.

These were all done by the kids. There is one thing which I contributed, "Paper flowers using strips of paper" which you can view for detailed instructions on that project.

Refer to my other projects of terracotta painting or embroidery on Paper for detailed descriptions.
1. First terracotta pot painting.
2. Embroidery book mark
3. A bookmark- paper embroidery and Quilling.
4. Terracotta candle holder.


Tuesday, February 02, 2010

A Bookmark- paper embroidary and Quilling

Bookmark project :-Initiated this project make something useful for my son’s teacher as one of her appreciation gift. I have used 2 craft concepts in making this bookmark. One is paper embroidery and the other concept is Quilling.

Quilling, also known as paper filigree, Artist discovered that narrow strips of paper could be rolled, scrolled, fluted, and fringed to make beautiful designs. Quilling can be added to any scrapbook, memorable photos, certificates, invitations, announcements, and greeting cards.

Paper Embroidery is not new to me. I have done couple of projects and you can refer to them for more information.

Bookmark project :- Take a red book mark card card stock and did the oval embroidery design in blue color thread and the flowers in light pink color as a border (four on the top and four below).
The flower inside the blue oval part is another craft concept called "quilling". You roll thin paper using a tool and once done shape it to any shape and glue the end to the shape. So each petal of the flower was done separately and glued to the card.

Then proceeded with the round shape in green color and stuck it next to the flowers inside the blue oval part. Then to fill the space outside the oval area, I added a small ribbon on the top and added 2 flowers (bought from a craft store) at the top and the bottom. Its in a form of sticker. Stick another red card stock at the back of the bookmark to make it look clean and to write a note for the teacher.

This gives me a sense of satisfaction and happiness when I can make something personally for the teacher to appreciate her work.

For more information on my embroidery project on paper refer to my blog "Embroidery bookmark".

Wednesday, December 17, 2008

Embroidary Card - Holly Wreath

Initiated this project to make a card for my son's school teachers. Since I was busy with my baby last year, I could not do something of this kind ( Embroidery on paper) which needed effort and patience.


This card design downloaded from online, pre-pricked the embroidery design with a special piercing tool and pricking pad. Completed the embroidery (Green for the leaves, yellow for the bow each of them with - 2 strands of embroidery thread) and finished off with red dots for border, and wrote Happy 2009 in the center.


Covered the inside of the card (which shows the thread) with another white sheet so it looks clean and nice. Wrote a personal message on the inside of the card.


This gives me a sense of satisfaction and happiness when I can make something personally for each of them to appreciate their work.

For more information on my embroidery project on paper refer to my blog "Embroidery bookmark".

This was one of the craft I did for them.. Refer to the other gift I did for them in my blog "Terra Cotta Candle holder".

Sunday, February 25, 2007

Embroidary BookMark


Initiated this project with the interest of expanding my Embroidery skills from cloth to paper to make something useful for my son’s teachers 2006 christmas gifts.

Well the effort and time is very minimal compared to their dedication, patience, efforts put to make my son’s day happy and memorable at school.

Purchased the supplies and design online , pre-pricked the embroidery design with a special piercing tool and pricking pad. Completed the embroidery and came up with my own ideas to finish it off with red ribbon for border, and glued some blue heart beads for the flower for the Front and beautified the back of the bookmark personalizing each teachers name and 2 teacher quotes as a part of inspiration for them .


This gives me a sense of satisfaction and happiness when I can make something personally for each of to appreciate their work.

All my efforts were worth it and rewarded when all the teachers loved it and were very surprised that I actually tried this out for the first time specially for them.


Monday, September 04, 2006

Goody bag for my son's bday party


Utilised my creative talent to make his day special for him. I personally created a goody bag in addition to other gifts and activities I had organised for his 2nd birthday party (held on 04/29/06).

About the BAG : A 3 dimensional bag made of foam (punched and tied with ribbon). Enhanced it with eyes and mouth and attached a ribbon as a handle to the bag. The bag, the goody stuff inside were not only admired and loved by all, but appreciated for every inch of effort.

About party Actvities: Initially each kid was asked to sit on the table and do some coloring. Gave the kids a blank bookmark and asked them to draw what they like and write "happy mother's day" and their names on it. Each kid at the end of the party handed the bookmark to their mom which indeed turned out to be a big surprise for the moms.

Tuesday, August 29, 2006

My First Cross Stitch Work


During our younger days, because of the complexity and time consuming process never tried cross stitch work. In my mind I assumed it was hardest of all projects. But when I was at home after marriage (had lot of time) wanted to try out new things, decided to give this one a try.

Got this book from a library where this design was done on a cloth and attached to a wooden tray and the top of the tray was finished with a glass. But since I did not have the materials to accomplish, I just tried out this design on a cross stitch cloth. When I was in India for a vacation in 2001, I got it laminated and decided not to do framing so that its different.

So this is my first cross stitch project, and completed it successfully. I think given the time I will try more of cross stitch if I come across anything appealing to me.

Needle work Embroidary


As I mentioned in my description, always tried needle work hand embroidary when I was young in school and also during our holidays. Over the years because of college studies, and work never got time to try out these crafts in many years. But guess what, time comes for everything they say..

In June 1999 got married and came to the US. Intially I was staying at home and so I had lot of spare time in my hand and wanted to do something creative. I had some embroidary threads from India , went to the santa clara library and picked some books which had good designs. This is one of them.

I had to learn only one stitch which is the trellis stitch -inside of the flower. But other than this stitch, I knew practically all the stitches and it was a matter of practice and it was done.

I also tried the framing on my own. I went to Aaron brothers and got the green frame, and a thick white board which they use for framing. So I put my yellow cloth on the white board, stretched the cloth so that there are no creases visible and taped it at the back. Then put the whole thing inside the frame sealed it. This piece is hung in our living room area. I should not forget to add, my husband did help me with the framing part. We both did this part of the project together even though its not a great deal.

Till today, everbody coming home looks at this and appreciates it.