Showing posts with label Paper Craft. Show all posts

Saturday, June 01, 2013

Making flower from strips of paper


This was gifted to my daughter's teacher.
The flowers were gifted to my Son's teachers.


While I was volunteering in class, one of my work was to trim the artwork done by kids (from my Son's class) and stick them onto another cardstock. So instead of throwing all the trimmed strips of paper  I decided to make something out of them. These were watercolor painting and were of different  colors. So all I could think of is making flowers out of them.  Turned out very beautiful and I gifted them to the teachers during Teachers appreciation week.


The strips I had were of different colors and different size in length and width. All I did was for one flower you need 4 strips (which will give you 8 petals) which I made sure they are the same size in length and width so that the flower petals will be uniform. Then you take one strip keep the white side facing you and then fold from both ends towards the center. Then take the next strip and continue to fold the same way. Then place this folded strip in the plus way and staple it. Then take the next 2 strips fold them the same way and staple it in the x direction. Then place the x folded flower on top of the plus folded flower to get the result. I made the kids also do some flowers. I had ready made paper flowers which I bought from Micheal's, taped it to flower in the center to hide all the staples. The kids chose those flowers and stuck them with glue.

Once you are done with all the flowers, I stuck each flower to a stick (with a tape) so that the teachers can use the flowers in future. Then arranged as shown in pictures and gifted to them.

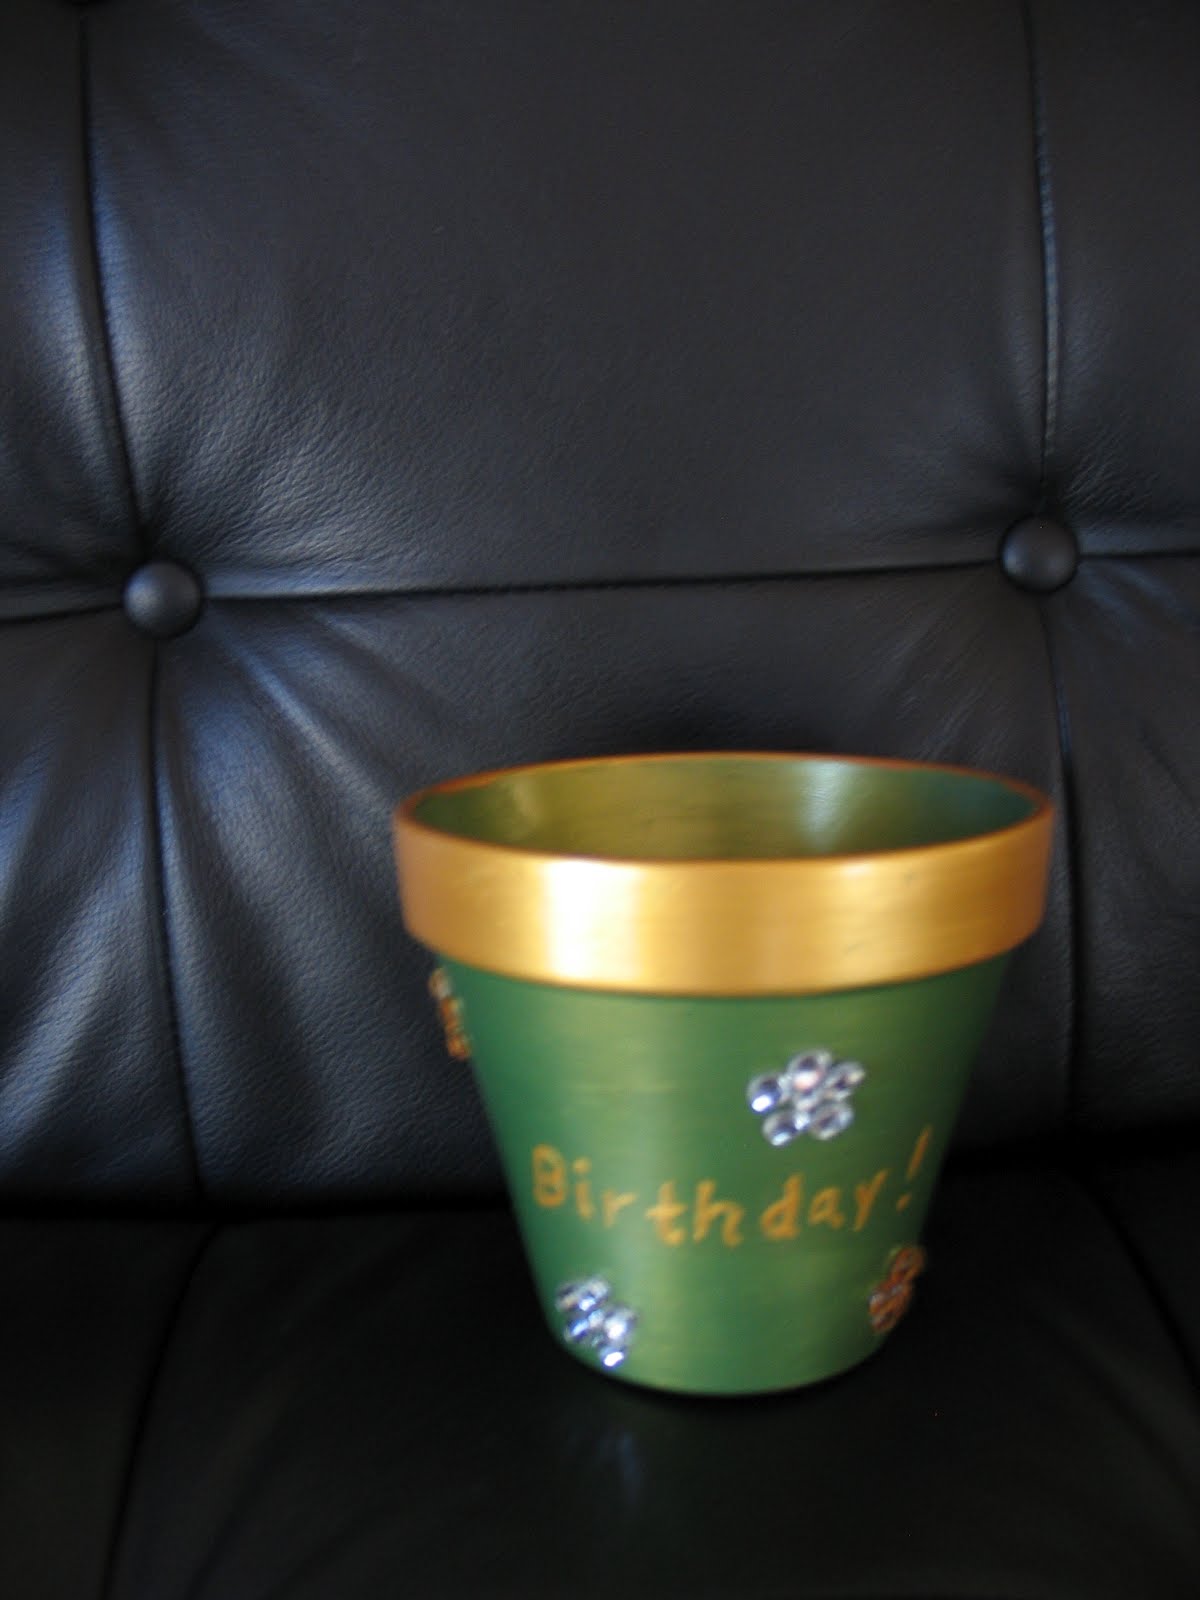
the pot painting and other things you see were done by my kids and you can refer to the blog "Teacher appreciation Week - 2013".

Christmas Tree from Paper Back made from scholastic book order pages.


I was volunteering in my Son's class, and one of the work was to assign all the scholastic book order pages for each kid. The were many pages left  in the book after assigning the orders for the class, instead of recycling those pages/books , decided to do this tree and gave it to my Son's teacher to keep it in class.

Its very simple, I have done this project before for my home and you can visit  this site for detailed instructions "A Christmas Tree from paper back" . This project turned out to be even better than my previous ones as there were many pages to the book. The more the no of pages, the better the tree comes out.

After this tree was done, I just hot glued some maple tree in green and golden which I had bought from the craft store just to give it shine. Then with a toothpick I glued the maple tree in golden and green on the top of the tree. I also glued white/silver ribbon around the tree. But other suggestions would be is to spray paint the tree silver and then accessorize with little ornaments. I have a problem with those paints, decided to do without the paint.

The teachers loved this tree and I heard that the other teachers visiting my Son's class also loved this tree.


Tuesday, January 22, 2013

Paper Christmas Ornament


Decided to try out this ornament made by paper. It was a easy one, and made the kids also help me so we gifted the teachers this ornament for Christmas.

Directions : for making 1 ornament
1. Cut out 12 circles (I used a circle punch) from Christmas card stock.
2. Then fold each circle into half (the design is inside or on the top while folding the circle)
3. Glue each folded circle to each other until the last one.
4. Before you glue the last circle place or glue the string (I used thin ribbons which I had at home). I made the string  into a loop so we can hang it on the Tree.
5. Glue the last circle and complete the  ornament.

Its a very easy project and kids found it easy to do this. Since I used hot glue I helped them with that part as I did not want them to get hurt.

Fun project to do with the kids.

Friday, May 18, 2012

Teacher Appreciation Week 2012 - by my Son

Teacher Appreciation Week for my Son's Teacher.

Its again this time of the year where we appreciate our kids teachers for all their effort. My Son loves to come up with ideas and since he is 8 years, I cannot influence him too much with my ideas also. He was very clear that he did not want to do the same as his sisters ideas, hence a different post as the gifts/ideas have individually come from them and are different.

Day 1 - Acrostic Bookmark- He has come up with an acrostic poem bookmark for his teacher.


Bookmark (Front side)
Bookmark (Back side)


 During my Son's birthday we had donated a book to the class. So he wanted to make a bookmark which his teacher will use for that book and later for herself, as she is reading this book to the class. He loves rainbow colors and he loves acrostic poems. Last year he has done acrostic for  "Teacher," he modified it to describe his current teacher and did a acrostic for Rainbow. So basically its a  "Rainbow bookmark for a RAINBOW (Acrostic) TEACHER (Acrostic)". My only help was for printing out for him and putting contact paper to the book mark so that it will not get dirty easily.


Paper fortune cookies
Day 2 - Fortune appreciation  - This idea came up when I asked my Son to come up with 10 things he likes about his teacher which in turn will turn into memories of 2nd grade. He easily came up with the 10 things, but we wanted the teacher to enjoy it in a unique way. Tuesday is the day where 2nd grade parents are providing lunch for all the teachers, so the idea clicked of presenting it in fortune cookie way. My son loves fortune cookies when we go to Chinese restaurants, so we decided to make it "paper fortune cookie" where his teacher can open it and read them. I have bought a take out box and filled it with these cookies and put a small note for his teacher. Initially idea was to make my son do the paper cookie but it was hard so I had to do them all. Got the steps from youtube.


Sail boat thank you
Day 3 - Sail boat Thank You -  During my Son's spring break, he painted a terracotta pot holder plate. He painted the plate blue inside with red rim, and Yellow outside with green rim. The colors were chosen by him and painted by him. Only the glazing /shine paint was done by me. The idea was to use this plate to hold the fortune cookies, but once this was done, he loved the piece and wanted to use it to do the sailboat for his teacher. So he finally learn to make a sailboat with a paper and pasted it to the plate. Since the plate looked too plain, I bought some fish stickers, he stuck them near the boat. On the sail boat he colored them with a sketch pen and on the base he wrote "Thank you for a smooth sailing of learning. It was Fun". Making of sailboat was much easier for him than the paper fortune cookie.


Day 4 -  Puzzle - I asked him to come with some puzzle for his teacher.  He had read about code word (i.e for each letter you assign a number) and instead of writing the letters you put dashes and a number for each dash (representing the letter). Since it was his idea I did not want to change anything. All I did was to stick it to a colored card stock and rolled it and tied a orange ribbon to make it look presentable.


 Day 5 - Gift Card Holder - My son wanted to give a gift  (gift card) which will be useful for the teacher. So I decided to come up with something nice for his Teacher. So I designed a Gift Card holder. Since Teachers keep getting gift cards, I decided to create one (which can hold about 12 gift cards). They can keep it in the car instead of carrying all the gift cards in their hand bags.  Hoping his teacher will find it useful.

My Son is going to come with the order (he wants to give) his teacher. I've just put them all up here in my own order.

My Son came up with some ideas and so did I with some, but I had intense joy in helping my Son do this for his teachers, as this is our only way to show our appreciation and gratitude for all their efforts and time they put in each and every day.


Sunday, May 13, 2012

Teacher Appreciation Week 2012 - by my daughter

Teacher Appreciation Week for my Daughter's Teachers.


Its again this time of the year where we appreciate our kids teachers for all their effort. This time I wanted to bring it out from the kids with very little help of mine. Since my daughter has started going to school, and is able to follow instructions, this time it was much easier than last year to make her do for her teachers.

We made gifts for the 5 days but gave it all on one day. She wanted to do it all on one day. We chose middle of the week and decided to give it to her teachers.


Day 1 Bookmark  - My daughter reads very well, and so wanted to thank them with a bookmark.

bookmark (front side)
bookmark (back side)
This is a very simple bookmark. If you see my other projects, this bookmark (in red) is a blank bookmark bought from the craft store (Micheal's craft store). On the Front side I had stuck a blue card stock. The flowers you see were bought  from this craft store. It had pins attached where you can prick a hole and fix it to the card with that pin. So I wanted to keep it very simple. The backside of the bookmark, I asked my daughter to write a note for their teacher "I love to read, thanks to you that I read so well!". She drew a small little girl and wrote her name below that. So this way we both put in effort.

Thank you note
Day 2 Thank you Note - My daughter made this on computer with the software kid pix. She loves to work on kid pix software, so I asked her to make a card for her teachers.  She  chose a rose and she added the border design and wrote a thank you and  her name. So I only helped her by printing this out and sticking to another thick card stock.


Paper Clay Magnets
Day 3 Magnets - During her spring break, she was doing things with paper clay so we decided to do some for her teachers. So all the 3  (we had clay molds) which she used to get the shape. She painted them last week before giving them. My part was to help her paint  the glaze paint (the glaze/finish) on them. Then the star face was drawn by me as she had already gone to bed. Following day after they were dry I had to stick magnets at the back, so they can be used as magnets. So that was my part but making the clay magnet was my daughter's part.

Day 4 Thank You Card - She wanted another card (with stickers).
I asked her to draw something for her teachers, and you won't believe it, she came with this heart sign (With I love you written inside) and the thank you coming as the string, she made it like a balloon, which I was really taken back. This was done on a white paper, so we used it as the inside of the card (stuck it to the inside). The front side had flower stickers so we used one flower and wrote Teacher appreciation week , and she stuck some bead stickers on top and bottom. Very simple but she loved doing it for them.

Day 5 - Gift for the teacher - She wanted to give something which they will use. Packed it in a little pouch and put all the item/gifts in one gift bag.

My daughter came up with some ideas and so did I with some, but I had intense joy in helping my daughter do this for her teachers, as this is our only way to show our appreciation and gratitude for all their efforts and time they put in each and every day.


Saturday, February 18, 2012

A cake made with paper clay and a terracotta pot

This is one unique gift which I made for a friend for her 40th birthday ! 2 things which I made, one is painted a terracotta pot decorated with beads, then another one is a cake made with paper clay as this can stay longer ! Placed the paper clay cake inside the terracotta pot and covered it with a use and throw glass. So when she lifts the glass you will see the cake for a surprise. This was decided last minute the reason being it will be a nice surprise (no one will expect a cake inside a pot) for a 40th surprise birthday party !

Paper clay cake - I wanted to make something unique and since I'm not into baking cake (even though I like to decorate one) so decided to give a try to this idea of making a cake with clay and then paint and decorate it.

This is a 4 tier cake (4 for representing 40 one for each 10 years) - the 3 tier cake is made with paper clay and the last top layer is actually a gift button (made in plastic) representing the top layer of the cake. With the button packet I also got 4 balloons (made with plastic) so I glued them to toothpick and made them stand on the cake (for decoration). The bottom layer of the clay I glued 4 designs which are made of plastic. Painted the lower layer of the cake blue. The middle layer of the cake I had made some designs in the clay so painted with pink and purple and pink on the top. The 3rd layer I had painted the cake orange. Then I glazed the cake with the shiny glaze . I had to glue the 3 pieces as they did not stick on top of each other very well. Then glued the top 4th plastic gift cake as the top layer. I made round balls and painted them with metallic silver and glued them to the 3rd layer (not shown in this photo) of the cake as decorations.


TerraCotta Pot - Painted the clay with green metallic paint and the rim with golden metallic paint. This is the first time I've tried with metallic paint. Then I bought these beads which can be glued and did a simple flower design with those beads. The color of the beads were silver and golden , so I alternated the flowers with alternate colors. 4 flowers below and 4 flowers on the top (below the rim of the pot). Then wrote happy birthday in the middle with golden paint.

Sunday, July 10, 2011

My Creation


I wanted to make an ARTWORK where I can bring out my creativity. This piece of artwork is very simple. I always wanted to do something with my scribbles and designs and this is just one of it.

If you see the background is black in color, and did a design with white pen. I did not want to do a very detail design, as it will not be visible from far. To bring out its beauty I added few colors surrounding the main/center design, and added colors to the flowers (you see surrounding outside). Did not want to put too much color where the main design gets hidden but a touch of colors here and there. Basically the 7 colors (Red, Blue, Yellow, Orange, Green, Purple and Pink).

The design is a combination of Mehendi/Henna design and adding color by cutting the black part and put a color paper below to bring out the colors to the front.

This frame I already had was black , just added an inside mat (french white) to add more depth to my design.

Not to forget mentioning - My family who helped me with this artwork. My son whom I can depend on to choose the colors (we tried out different combination's of colors before we chose this one) and my husband who wanted the inside mat for giving depth and for helping us hang this picture in our family room. My daughter who appreciates all my work all the time always with a smile.

For my other similar posts refer to My scribbles which grew over years into design.

Monday, February 14, 2011

Woven Heart Basket for Valentines Day !


This was indeed a very nice craft to do. I made this for my Son's and Daughter's teachers. I wanted to make this for putting a gift card and few chocolates for the teachers.  I got this idea from the following website :
http://familyfun.go.com/how-to-videos/familyfun-woven-heart-basket-762419-v/

I would really like to thank them for this wonderful Idea. This is very simple but very elegant to hand out gift cards to the teachers.


Steps to go about doing this craft can be taken from the above mentioned website or for convinience I've pasted them below too !.
Materials for this project are :
  • Printable patterns (see Step 1)
  • White or colored paper
  • Markers or crayons (if using white paper)
  • Scissors
  • Glue
Instructions
  1. Print two copies of this template. If you are printing the templates on colored paper, print one of them on pink paper and the other on red; otherwise, print both templates on white paper and color them as you wish with markers or crayons. 
  2. Fold the printouts in half. Carefully cut out the shapes and cut along the dotted lines. The weaving steps will be a bit easier if, as a crafter has pointed out in her comments below, you cut a bit further up the inner dotted lines than indicated. Go slowly -- the more precise your cuts at this step, the better the basket will look.
  3. Time to start weaving. Orient the two halves, still folded, at right angles to each other, as shown in the photograph. Be sure that the "bumps" on the strips on each half point away from you.
  4. Now thread the left-hand strip furthest away from you through the right-hand strip furthest away from you.
  5. Thread the right-hand strip furthest from you through the next left-hand strip, the one second-furthest away from you.
  6. Now thread the next left-hand strip, the one third-furthest away from you, through the right-hand strip furthest away from you.
  7. Thread the right-hand strip furthest away from you through the left-hand strip second-furthest away from you.
  8. Finally, thread the left-hand strip closest to you through the right-hand strip furthest away from you. Whew! One pass down, four to go.
  9. Snug the right-hand strip up towards the curved end of the left template as far as it will go and smooth everything down (a process you should repeat after each round of weaving).
  10. Thread the right-hand strip second-furthest away from you through the left-hand strip furthest from you. See the pattern? Continue alternating your weaves either through or around the other strips until all the strips are finished.
  11. Glue on a paper handle if you like.
follow steps1 & 2.
follow steps  3 & 4.
Follow steps 5-10.


Final View

Valentines Heart Decorated by Kids


Wishing Everybody a "HAPPY VALENTINES DAY"  from our Family to Yours !! These valentines were decorated by my kids. It was my Son's  sharing at school where they had to decorate a valentine heart and he made it so that the Teacher can hang it in class. We cannot do this project without my daughter's cooperation, so we asked her to decorate one too. We decided to hang this at our door.

Red heart to the left:-  Crafted by my Son. Cut out the red heart from a card stock. My Son wanted to use shiny beads, sticker beads and feathers. In the middle he wanted to write "Happy Valentines Day". So he drew 3 borders to mark the space for each of the 3 items he wanted to paste. Then he applied glue on the stock and started sticking the shiny beads and feathers. Then he added little of bead stickers in the end. Then he added gold glitter glue to the borders where the pencil drawing was shown. Then wrote "Happy Valentines Day" in pencil and darkened it with a sharpie pen.

Red heart to the right :- Crafted by my daughter. My son cut out the red heart for her. She wanted the 3 butterflies so we made a hole and attached the butterfly for her. Then I applied the glue, but she was too good in sticking the shiny beads. Then I asked her to write happy Valentines day, and she wrote "Happy Happy Valentines Day" in pencil and darkened it with a sharpie pen. I guess this was one of her few projects and she got excited to do this. Then gave her little bead stickers to stick in the empty spaces. Added a little glitter glue around.

This was indeed a short and fun project to do with them. Thanks to my Son' school for this Idea.

Tuesday, February 02, 2010

A Bookmark- paper embroidary and Quilling

Bookmark project :-Initiated this project make something useful for my son’s teacher as one of her appreciation gift. I have used 2 craft concepts in making this bookmark. One is paper embroidery and the other concept is Quilling.

Quilling, also known as paper filigree, Artist discovered that narrow strips of paper could be rolled, scrolled, fluted, and fringed to make beautiful designs. Quilling can be added to any scrapbook, memorable photos, certificates, invitations, announcements, and greeting cards.

Paper Embroidery is not new to me. I have done couple of projects and you can refer to them for more information.

Bookmark project :- Take a red book mark card card stock and did the oval embroidery design in blue color thread and the flowers in light pink color as a border (four on the top and four below).
The flower inside the blue oval part is another craft concept called "quilling". You roll thin paper using a tool and once done shape it to any shape and glue the end to the shape. So each petal of the flower was done separately and glued to the card.

Then proceeded with the round shape in green color and stuck it next to the flowers inside the blue oval part. Then to fill the space outside the oval area, I added a small ribbon on the top and added 2 flowers (bought from a craft store) at the top and the bottom. Its in a form of sticker. Stick another red card stock at the back of the bookmark to make it look clean and to write a note for the teacher.

This gives me a sense of satisfaction and happiness when I can make something personally for the teacher to appreciate her work.

For more information on my embroidery project on paper refer to my blog "Embroidery bookmark".

Monday, April 27, 2009

Scratch design DIY kit

As you know by reading my posts that I'm very much interested in crafts. I created this DoIt Yourself Craft kit as one of the items in our this year goody bag for kids.

I ordered the scratch design frames (100 of them) from the web which comes from different shapes and sizes.

Created a kit where- each kid gets 4 frames to design ,a craft stick, instructions and a sample frame designed by me. Basically you can draw with the craft stick (cut at an angle and can be the tool to scratch or draw) and the black part comes out and your design shows up with rainbow colors. Decided to do this as one of the items because my son loves rainbow colors.

The picture included in this post are frames designed by me and given as a sample for the kids to get an idea on how to go about doing this craft. Seems or looks to be very simple but when we need to do 35 of them, what do you say ?


For me this craft and making this craft kit for kids was very exciting and new thing to try. So hoping the kids are going to love it the same way as I did.


For more information on the goody bag craft in detail refer to my blog post "A Goody Bag with butterfly and 3d gem stickers".

Wednesday, December 17, 2008

Embroidary Card - Holly Wreath

Initiated this project to make a card for my son's school teachers. Since I was busy with my baby last year, I could not do something of this kind ( Embroidery on paper) which needed effort and patience.


This card design downloaded from online, pre-pricked the embroidery design with a special piercing tool and pricking pad. Completed the embroidery (Green for the leaves, yellow for the bow each of them with - 2 strands of embroidery thread) and finished off with red dots for border, and wrote Happy 2009 in the center.


Covered the inside of the card (which shows the thread) with another white sheet so it looks clean and nice. Wrote a personal message on the inside of the card.


This gives me a sense of satisfaction and happiness when I can make something personally for each of them to appreciate their work.

For more information on my embroidery project on paper refer to my blog "Embroidery bookmark".

This was one of the craft I did for them.. Refer to the other gift I did for them in my blog "Terra Cotta Candle holder".

Tuesday, December 09, 2008

WindMill for my Son's bday party gift


Did this windmill as one of the items of goody bag for my son's 3rd bday party in his Montesoori school. All the kids and the teachers loved this idea.

Purchased the windmill craft kit from a craft store online, manually had to fold them and make the windmill (with the instructions given ) and color and paint them according to our taste. Since he was learning ABCs and 123, decided to print A B C... Z on one side and color the front side with crayons, and glitter paint.


Manually doing 42 (only 30 needed for school but did some extra ones for him to play and to give the neighboring kids) was a challenge as I was really getting tired with my second pregnancy and was in due in 2 months. So getting sleep itself was a challenge but worth all the effort I put into this. My son loved them.

Sunday, February 25, 2007

Embroidary BookMark


Initiated this project with the interest of expanding my Embroidery skills from cloth to paper to make something useful for my son’s teachers 2006 christmas gifts.

Well the effort and time is very minimal compared to their dedication, patience, efforts put to make my son’s day happy and memorable at school.

Purchased the supplies and design online , pre-pricked the embroidery design with a special piercing tool and pricking pad. Completed the embroidery and came up with my own ideas to finish it off with red ribbon for border, and glued some blue heart beads for the flower for the Front and beautified the back of the bookmark personalizing each teachers name and 2 teacher quotes as a part of inspiration for them .


This gives me a sense of satisfaction and happiness when I can make something personally for each of to appreciate their work.

All my efforts were worth it and rewarded when all the teachers loved it and were very surprised that I actually tried this out for the first time specially for them.