Showing posts with label Ceramic Painting. Show all posts

Saturday, October 08, 2011

Summer Crafts - ceramic crafts and clay projects

During Summer the kids got to spend time doing doing crafts apart as their indoor activity and little bit of watching TV. I got to spend lot of time with them doing clay projects (Terra Cotta and regular colorful clays) and taking them to Color me Mine a studio for painting ceramic items. Apart from outing, they did lots and lots of coloring and drawing on paper, which they always loved to do. This blog mentions about the ceramic project and clay project.

Color me mine Activity- As you know I'm a big fan of ceramic paintings and done a lot of them. I also have taken my Son many times for him to paint. I started this year with my Daughter and got her introduced.
My Daughter - Its her first experience this year. She started with her 1st one with painting a cup pink and purple inside. The second one she did was a fish with orange and black.

My Son - This was his 5th project and he chose the ship/boat. He was very comfortable doing this one as he has done it multiple times.
They also did small items like the cupcakes and a candy by my Son and a cupcake and Hippo by my daughter. So they just loved doing all of it.


Clay Projects Kids got to try different types of clay -terra cotta, regular kids play dough and also a sculpy clay which you can mold and bake in the end.

Sculpy Clay The sculpy was fun for them to try out play with them. In the end we took few of them baked it in the oven as per the instructions and they saw the clay could harden and they were amazed to see the texture before and after baking.
Terra cotta Clay Kids loved the mud like effect of the clay. My son did a football, I did a basket and my daughter did a birds nest with eggs inside. They just loved doing.

Other activities was canvas painting, drawing and coloring, playing with the soft toys and playing with their tent inside.

Sunday, May 09, 2010

Ceramic Business card holder


As you all know when I gift, I use my creativity and hard work which gives me intense pleasure and satisfaction when I do something personally for somebody. This project was done in March 2010 but gifted on April 5th 2010.


This gift which I've mentioned is very simple but got time to do this for my agent. She has indeed put in a lot of hard work in getting this house for us. So to really show our appreciation and her dedication I created this small gift - business card holder so that she can keep and use at her office.

I painted the main part with green sparkle paints and the front with orange sparkle paint. With black paint I wrote her name. At the back with black paints, wrote " Thank You". Underneath the holder,put my initials as usual.


For more detailed information on ceramic painting projects - refer to the following individual projects "Introduction to ceramic painting" or "Ceramic plate painting" or "Ceramic tile candle holder" or "Ceramic toothpick holder".


Friday, March 13, 2009

Ceramic tile - Candle holder (wall hanging)


To blend things in the kitchen and family room, I used the same color theme for this tile (as my ceramic toothpick holder) to the ceramic tile so that they can go in the same room. I created 2 pieces of the same deisgn to be hung either side of the patio door in our family room. I ordered a iron cast frame (from online) for this tile which comes with candle holder. The tile size I've used is 6 inches.

The design was very simple, just a color of orange,blue, green as border then a red flower in the center. Outlined the orange, blue and green border with black paint to give an elegant look. Also colord the back of the tile black to match the cast iorn frame.

The 2 tile candle holder which I created are hanging in our family room and filling up the empty space in our family room.

Reading my other ceramic projects, you bet must be wondering how different it is from the rest. Well it is. If you observe the paint, its different from my other ceramic crafts projects. It is called "sparkle paints", so it has tiny particles along with the paint to give it a shine once glazed. So there are very few colors to choose but I've used sparkle paint throughout.

For more information on my ceramic projects, refer to my previos blogs "Introduction to ceramic painting" , "ceramic mug painting", "ceramic plate painting".

Tuesday, February 10, 2009

Ceramic toothpick holder


This piece was created to enhance my kitchen window . With curtains and windows being all white in color, wanted to add small details to the window. We put a small plant on a thin dark blue vase. So wanted to add more details to the whole area.

This piece in the store said it can be used as a toothpick holder. So for parties I can use it as a toothpick holder and for the rest of the time it can be a decoration on my kitchen window.

Reading my other ceramic projects, you bet must be wondering how different it is from the rest. Well it is. If you observe the paint, its different from my other ceramic crafts projects. It is called "sparkle paints", so it has tiny particles along with the paint to give it a shine once glazed. So there are very few colors to choose but I've used sparkle paint throughout.

For more information on my ceramic projects, refer to my previos blogs "Introduction to ceramic painting" , "ceramic mug painting", "ceramic plate painting".

Tuesday, December 16, 2008

Personal Ceramic purse gift


This was personally done for our Friend's daughter who was performing Bharatnatyam (Indian Dance) concert/achievement. This is very tiny gift (amount of effort) compared to the effort the girl put in for her achievement. I wanted to gift her something which she can use.

Again as you know me, I tried out a new technique. This technique was done on a ceramic plate by a staff member in that store. So they taught me how to go about doing this one.

So paint the base white (only once) and the handle, rim and inside of the purse pink (3 times to get a darker color). Then using the other side of the paint brush keep dots (one bigger dot) using one color. Then on top of that bigger dot, keep a little smaller dots (using different size brush) with a different color. Then again a third smaller dot on top of the second dot using a another different color. Fill up the whole purse with this kind of dots. Finished the piece by writing her name.

For more info on my ceramic painting experience refer to this link on "Introduction to ceramic painting" post.

Tuesday, December 09, 2008

Star Ceramic Gift Box


This is again another ceramic project of mine, made it as a gift for my sister in law. The inside and outer cover is dark green and the base of the box is white. With contrast of green and white flower design.

This star gift box can also be used as a gift during valentines day, or birthdays. Indeed it was a nice gift for my sister in law.

For more info on my ceramic painting experience refer to this link on "Introduction to ceramic painting" post.

Sunday, February 25, 2007

A Ceramic plate ( memory gift )


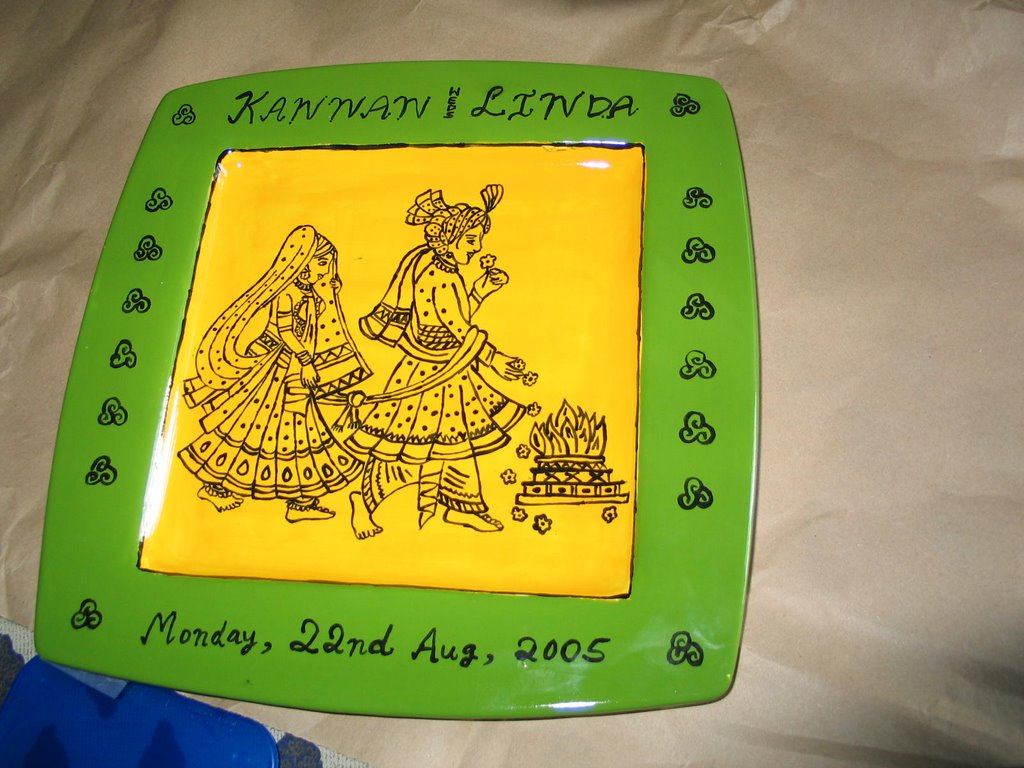
With a whole lot of confidence with Ceramic painting and this being my 5th piece I wanted to make something really special and personal for my brother-in-law and wife for their 1st wedding Anniversary gift in August of 2006.

Fetched this design online which depicts an Indian Wedding where the ceremony is essentially a Vedic Yagna (fire-sacrifice). By law and by tradition, no Hindu marriage is deemed complete unless in the presence of Sacred Fire, seven encirclements have been made around it by bride and the groom together.

They loved this piece too and it makes my effort and inspiration well worth it.


Sunday, September 17, 2006

Ceramic Mug Painting


Hurray to this piece as it got me back into exploring my creative talents after 3 years of break for various reason – work , home kid, huzzy buzzy life style .

Well when I am getting back I still wanted to try out something new in Ceramic Painting - Etching and Sponging.

Etching : if you notice the red and green area in the mugs, you can see a design which has been etched. Initially paint the color yellow (2 times) as the base coat, and painted red or green respectively (2 times) on top of the yellow area. After the paint has dried, draw the desired design and etch the design (by scraping out the paint very finely so that yellow paint below the red/green area is visible). Be careful only to remove the red/green paint and not the yellow paint from the design.


Sponging : Alternating to the red and green , a new technique was tried out scalled sponging - Using a sponge you wet the sponge with yellow paint and keep pressing little by little on the mug. On top of the yellow paint (on the sponging area), you wet the sponge with brown color and did the sponging again. Sponging should be done only once.


For more info on my ceramic painting refer to this link on "Introduction to ceramic painting" post.

Tuesday, September 05, 2006

Ceramic plate Painting


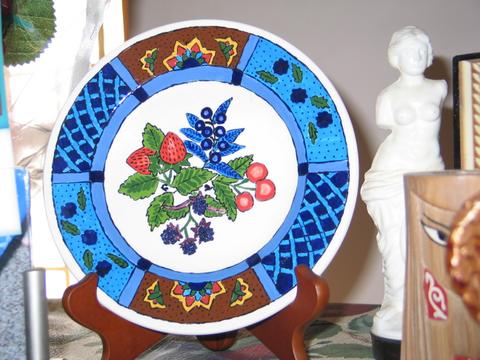
In Year 2002, I did a ceramic plate for my mom as a gift. I took a picture of it this year when I was at her place.

I bought a book from Micheals craft shop which had this design for a ceramic plate. So traced this design on this plate and I had to go 2 sittings or more to complete this piece. I think this is my family's favourite one.

For more info on my ceramic painting refer to this link on "Introduction to ceramic painting" post.

Thursday, August 31, 2006

Introduction to Ceramic Painting

Brief Introduction
hmm where should I begin ..... I was working in a software company near Race street San Jose, CA. Close to my office was a place called Petroglyph (A ceramic painting shop) . This is how this shop works. You choose a piece and pay for the piece and the studio fee (where you can sit for hours and paint using their paint, brushes, designs). Then after we finish painting, we give them our piece and they finish our piece with baking and glazing and give it back to us. I was just attracted to this place and knew I need would give it a try,

First Tile Painting
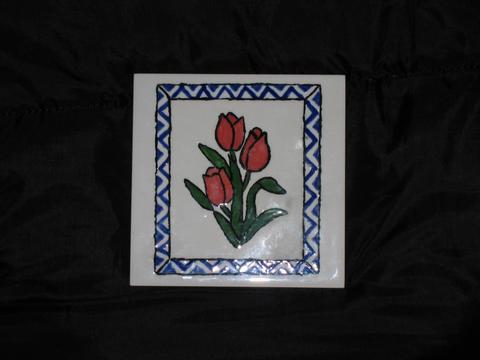
I did this tile painting, simple border and flower because I was on the learning process. I traced this design and painted. The only mistake I did with this one is adding water and painting. But well, only by mistakes you will learn right ??

When you actually paint, the colors appear very differently to what the actual color will be. So choosing the colors initially was bit hard for me. After I complete my painting, I give them my piece for finishing and glazing. Then you can pick it up the day its ready for pickup.


Second Tile Painting
My twin sister was in town the year 2001 December. So I took her to this place and we spent the whole day doing this design.

This is indeed a nice memory for us. Till today we talk about this piece.